Analyze engagements
The Engagement page shows completed engagements as well as incomplete engagements that have at least one completed session. To open the Engagements page and analyze results, click the top icon on the navigation toolbar. Typically, risk analysts use the page to examine and handle risky sessions.
Engagements aggregate sessions, online or offline. A single engagement may have multiple sessions. For example, when a person calls the IVR, is transferred to an agent, and is then transferred to an additional agent, all in a single call.
Review the list of engagements
The panel on the left shows a list of engagements filtered by default criteria. If you modify the filter, the page saves it automatically.
Note:
Filter is saved per browser, and isn’t saved when working in incognito mode.Click the arrow to collapse or expand this panel.
By default, the list displays only 10 engagements. Click Show More to expand the list. Use the up and down arrows on the top-left of the Engagement details panel to go through the engagements in the list one-by-one.
Each list item shows a timestamp, the claimed person ID, the risk score (if available), and the assigned analyst. If the engagement isn’t associated with a claimed person ID, the title shows a claimed phone ID or a blank space.
Click the search icon to narrow down your list using filtering criteria, or find a specific engagement using its Engagement or correlation ID. To know which of the identifiers are supported, see Searching engagements.
To update or refresh the Engagement list, click the refresh icon.
To download a list of up to 2000 engagements results, click the download icon.
You can assign multiple engagements to an analyst. Select the engagements one by one by checking the checkbox in the list. You can also select the entire list by selecting the checkbox at the top of the list. Once selected, click Assign selected to and select the desired analyst.
Search engagements
You can search engagement using the following identifiers:
- gk_engagement_id
- engagement_id
- correlation_id
- phone
- claimed_person_id
- claimed_gk_person_id
- fraudster_id
- gk_fraudster_id
- session_id
- gk_session_id
- first name and last name
Examine engagement details
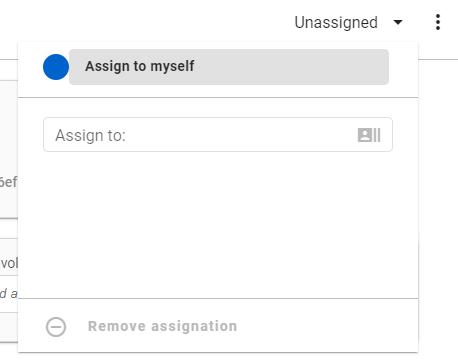
Click an engagement in the list to view its details. At the top right of the page, Unassigned or the name of the analyst assigned to the engagement appears. Click the arrow to the right to change the analyst assignment.
The first panel contains a summary including the engagement opinion, which is usually an aggregation of the opinions in the engagement’s sessions.

You can also find the engagement’s IDs in this first panel. Each ID has a different purpose:
- Correlation ID: A non-unique identifier generated outside of Gatekeeper. Associates the Engagement with a phone call. You can use the correlation ID to identify multiple engagements that occurred over the same phone call; the engagements from that call have the same correlation ID.
- GK Engagement ID: A unique identifier generated by Gatekeeper. Identifies the engagement within Gatekeeper.
- Engagement ID: A unique identifier generated externally. Used to find or identify an engagement with an ID that’s meaningful outside of Gatekeeper. To find this ID, click the three dots in the top-right corner of the Details panel, then click Edit App Data.
Note:
Offline sessions don’t affect engagement risk engine decisions.The second panel contains the engagement verdict (authentic, imposter, and such), a free text field with the verdict reason, and the amount involved (currency isn’t specified).
Examine session details
To drill further down into the engagement, examine the session level details. Each session panel shows the following:
- Session type
- Claimed ID (if available)
- fraudsters (when the Session is associated with one or more fraudsters)
- A factor map with all the factors that participated in the Session (risky factors are marked red)
- Score
- System opinion
Each session can contain the following two IDs:
- Session ID: A unique identifier generated outside Gatekeeper.
- GK Session ID: A unique identifier generated by Gatekeeper.
You can expand each session to view additional details such as biometric samples (typically one sample), phone number, agent name, agent opinion, print profiles, and risky factors. Under person or Fraudster data, the system displays print profiles that were involved in the engagement. Click Show all to see all print profiles.
Under Risky factors, click Show all to view all factors and factor details. If the session performed an identification, click show details in the identification factor to see identification results, including fraudster and person profiles that participated in the identification.
To view session properties, such as errors and consent statuses, click the three-dot menu in the session’s first column, then click App Data.
See Entity attributes and limitations for more information on the limitations for entity names used in App Data.
Abandoned session status
A session is labelled Abandoned if the call was disconnected during a biometric operation or while capturing audio for potential enrollment, so that the agent on the call didn’t get to see the operation’s results. A disconnection after verification doesn’t result in an Abandoned status.
Session app data
Session App Data provides information on various session properties that can help to know more about every session that takes place during an engagement, such as consent status, voiceprint data, authentication time, and errors occurred, if any.
The following table describes various app data properties that are part of a session:
| Property name | Description |
|---|---|
| Data center | Defines the name of the data center from which the request originated |
| Business Type | Defines the session business type, also known as line of business |
| Initial Consent Status | Indicates the consent status at the beginning of the session |
| Final Consent Status | Indicates the consent status at the end of the session |
| Initial Voiceprint Lock Status | Indicates the voiceprint lock status at the beginning of the session |
| Final Voiceprint Lock Status | Indicates the voiceprint lock status at the end of the session |
| Initial Voiceprint Enroll Status | Indicates the voiceprint enroll status at the beginning of the session |
| Final Voiceprint Enroll Status | Indicates the voiceprint enroll status at the end of the session |
| Final Voiceprint Enroll Status Reason | Indicates the reason of a failed enroll |
| Initial Voiceprint Train Status | Indicates the voiceprint train status at the beginning of the session |
| Final Voiceprint Train Status | Indicates the voiceprint train status at the end of the session |
| Eligible Voiceprint Profile Enrollment | Indicates if the media was eligible for enrollment |
| Abandoned | Indicates if the call was abandoned before it was fully handled |
| Max Audio Reached For Voiceprint Profile Enrollment | Indicates if the audio reached the maximum length limit |
| Min Audio Reached For Voiceprint Profile Train | Indicates if the audio reached the minimum length limit |
| Group Size | Indicates the group size, that’s number of persons in the group |
| Call Handle Time | Indicates the time to handle the call |
| Time to Authenticate | Indicates the time to authenticate from the beginning of the call |
| Time to Authenticate Person | Indicates the time to authenticate from the moment the agent enters the person ID |
| Restart Counter | Indicates if the call restarted |
The following table describes various properties related to errors that occur in a session:
| Error | Description |
|---|---|
| Status Code | Provides the error code status |
| Error Context | Provides the error type |
| Error Message | Provides details about the error |
| Error Timestamp | Provides the time when the error occurred |