Web Agent Console
The Web Agent Console (WAC) serves as an intuitive interface for call center agents to easily authenticate a customer using voice biometrics. The console clearly displays the authentication status of the customer and allows the agent to perform additional operations such as opting out a customer, marking the call as suspicious, and more.
Configuration parameters
To customize the behavior of the WAC, set the following configuration parameters:
- Web Agent Console
- Web Agent Console Grouping Mode
- Web Agent Console Language Settings
- Web Agent Console Platform Integration
- FlowVersion in Contact Center
The localization parameters accept JSON content. You can download these JSON examples:
For detect known fraudster flow that excludes any other biometric operations, the following configuration parameters are recommended:
| Configuration parameter | Detect known fraudster flow |
|---|---|
| FlowVersion | dkf-v1 |
| ExternalPersonIdKey | Empty (blank) |
| DisplayPersonId | false |
| DisplayCallerName | false |
| DisplaySubmitPersonId | false |
| EnglishCustomLocalization | { "CONSTANT.STATUS.WAIT_PERSON_ID": "Fraudster Detection In Progress" } |
URL specifications
The WAC supports an optional URL path and parameters.
The optional URL path follows the base URL to access the WAC. These URL paths are as follows:
/<tenant>: Replaces the need to enter the tenant in the login screen./<tenant>/<extension>/: Skips the login based on the provided tenant and extension.
The optional URL parameters are as follows:
gk_scope_id: Defines a selected scope. This option is useful when an agent is authorized to use several scopes. The value is the internal Gatekeeper scope ID.scope_name: Defines a selected scope. This option is useful when an agent is authorized to use several scopes. The value is the name of the scope.language: Defines the preferred language by the agent. Supported values areen(English),fr(French), ornl(Dutch).platform: Defines which telephony platform to use in cases where the scope supports several telephony platforms.login_with_entra_id: If true, the tenant field wouldn’t be required for the login. Note thatlogin_with_azure_adis deprecated.login_hint: Defines the selected account or email address to use during login for the sole purpose of skipping the account selection dialog. The value provided here doesn’t necessarily correspond to the login hint value configured or used for this user later in the authentication flow. This option is useful when an agent has multiple accounts with the identity provider.preferred_layout: Defines the preferred layout size of the WAC. Supported values are regular (default size) and mini (reduced size). See Mini WAC section for the new mini layout.theme: Defines the selected color palette and theme. Supported theme values are dark and light.storageMethod=1: For more details, refer to Storage partitioning in Web Agent Console.
All URL parameters are passed to the telephony connector as metadata.
Note:
For more details on diagnostics and troubleshooting steps related to storage partitioning in Web Agent Console (WAC), refer to the Storage partitioning in Web Agent Console topic.The following table lists the examples of what these paths and parameters can look like in combination:
Theme and layout
Both theme and preferred layout values can only be selected at login and can’t be changed after the user is logged in.
Select a theme
The WAC supports both dark and light themes.
To toggle between the light and dark themes, click the  icon on the top-rigt corner of the login page and select the theme you want.
Alternatively, you can also set the URL query parameter theme to specify the selected theme; for example, theme=light.
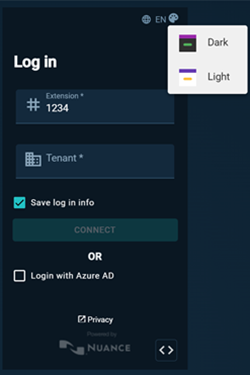
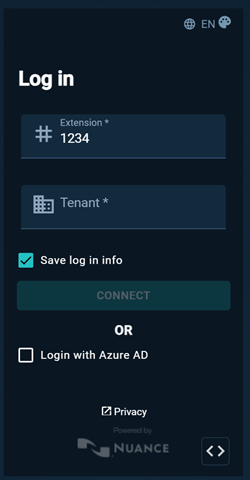
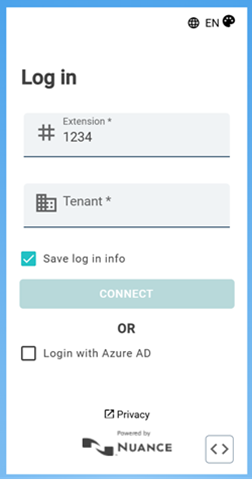
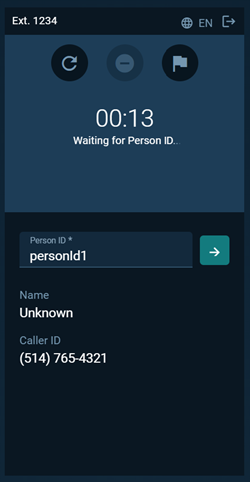
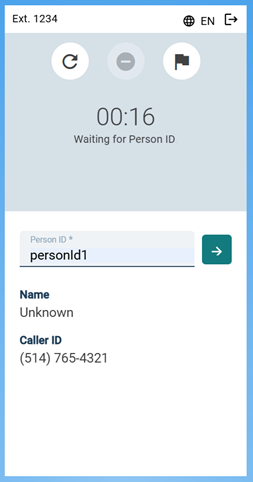
For example, when light theme is selected, the console changes its color palette to reflect the selected theme. Here are some side-by-side examples of dark and light themes.
Login page
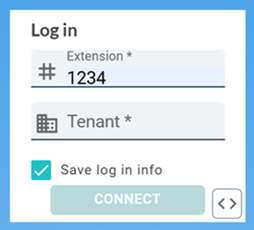
Login page in mini WAC layout
Note:
For the mini WAC layout mode, theme selection can only be done through the URL query parameter theme.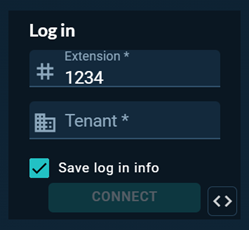
Start a call
Mini Web Agent Console
You can set the preferred layout of WAC through the URL query parameter preferred_layout only.
To turn on the mini WAC mode, specify preferred_layout=mini in the URL. To switch back to the regular layout, specify preferred_layout=regular in the URL. For example:
https[]()://agent.gatekeeper.nuance.com/web-console/login?preferred_layout=mini&theme=light&language=en
There is no option on the WAC to change the layout.
Once the mini WAC layout is selected, the WAC displays in a minimalist size. In this reduced size, the application only displays what’s strictly required. This is useful when the WAC needs to be constrained to a limited space.
The mini WAC layout is only supported for the person flow and detect known fraudster flow. It isn’t supported for the grouping flow. The WAC would revert to its regular size before a call is handled if a grouping flow is configured.
Here are a few examples of the mini WAC layout.
Login page
Note:
The language and theme controls aren’t displayed in the mini WAC mode. They can, however, be specified with their associated URL query parameters.Start a call
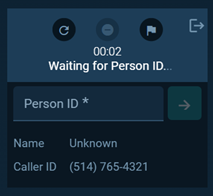
Enroll a customer
Log in
When opening the WAC, you are first prompted to login. You can access the WACe through the following URLs:
- https://agent.gatekeeper.nuance.com/web-console/login ,
- https://agent.gatekeeper.nuance.ca/web-console/login , or
- https://agent.gatekeeper.nuance.co.uk/web-console/login .
When logging in, you may be required to enter an extension and a tenant.
Click the  icon to copy diagnostic information to clipboard that could be attached to reported issues (even after the issue has occurred).
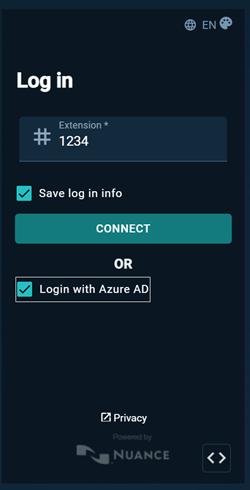
When you select Login with Azure AD, the following login screen displays where the Tenant field isn’t required:
Call monitoring
Once you’re logged in, the console waits for the next call.
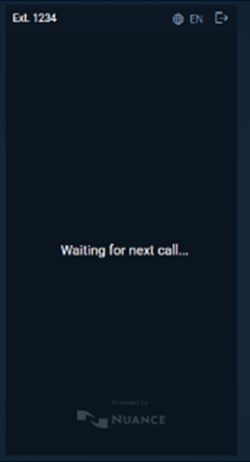
Person flow
Start a call
When a call comes in, enter a Person ID (if available) for the system to validate. This behavior is configurable per scope. If you don’t provide a Person ID, you can’t perform voice biometrics operations. However, you can mark a call as suspicious.
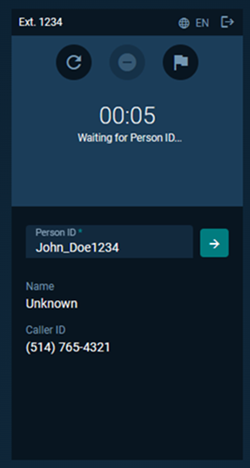
The display of caller ID, first name, and last name is propagated from the telephony integration or from a different source. When this information isn’t available, the screen displays unknown.
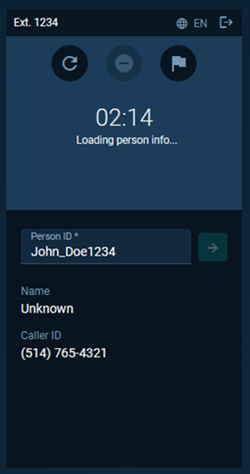
After you enter the person ID, the system determines the person’s voiceprint status based on the following conditions:
- If the customer isn’t fully enrolled and wasn’t opted out, you must authenticate the customer and get consent. Then, the system offers to enroll the customer.
- If this is an enrolled customer that isn’t opted out and the voiceprint isn’t locked, the system proceeds with authentication.
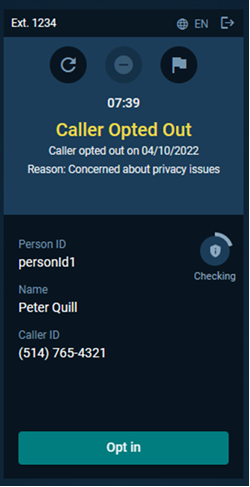
- If the customer is opted out or the voiceprint is locked, the system displays a status screen:
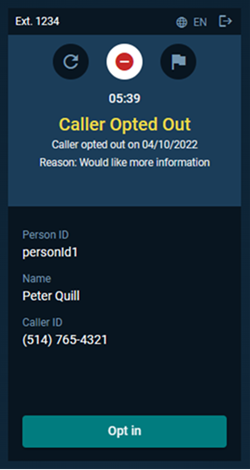
Enroll a customer
After authenticating the customer and capturing consent, click Enroll or Continue Enrollment. (Continue enrollment is available when a customer was partially enrolled in a previous call).
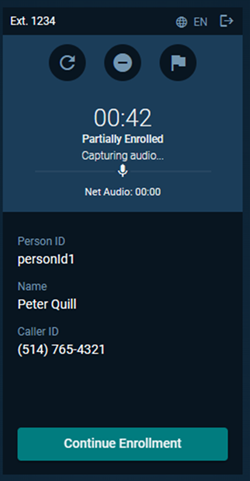
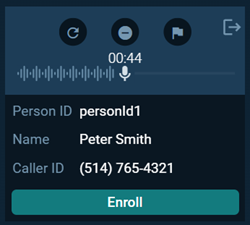
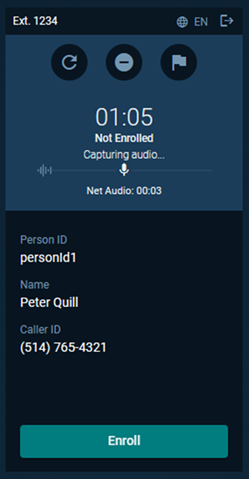
The audio capture progress bar indicates how much customer speech was captured. You can confirm enrollment at any time in the call by clicking Enroll (even before reaching the minimal amount of enrollment audio required). First, the system captures audio:
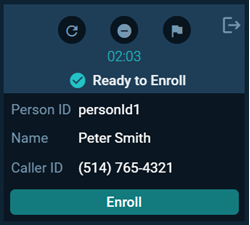
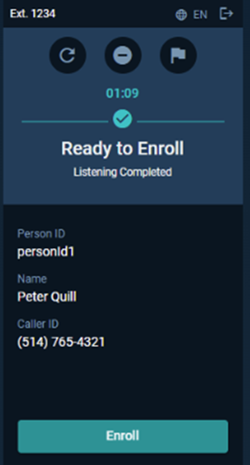
Then, the system displays a ready message, and the process begins:
Next, the system enhances the voiceprint with more audio:
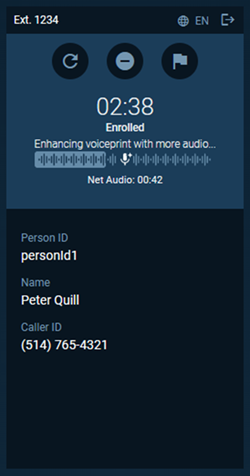
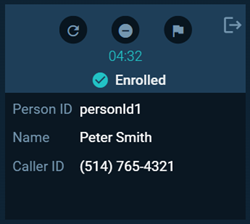
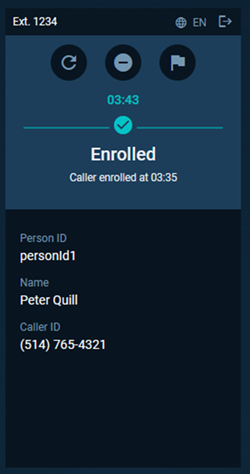
If the customer provided the required amount of valid audio to enroll, the voiceprint enrollment process completes and the screen shows Enrolled. If configured, the application automatically silently conducts a fraud check during enrollment to ensure the customer isn’t on a watchlist. If not enough audio is collected, the caller is partially enrolled. If the call was disconnected while capturing audio for potential enrollment, the call session is labelled Abandoned. This appears as a property in the session’s details.
Verify a customer
If the caller is an enrolled customer that isn’t opted out and the account isn’t locked, the system proceeds with verification:
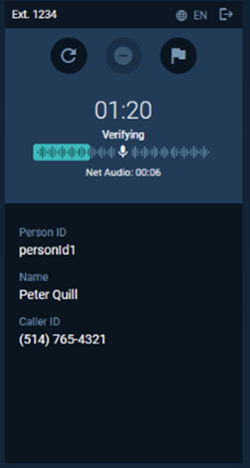
This process takes a few seconds during which, if configured, the system silently conducts a fraud check to ensure the customer isn’t on a watchlist. If you receive a Match, the customer is authenticated:
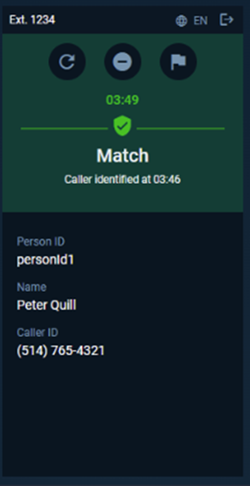
If you receive a Mismatch, the customer’s voice doesn’t match the voiceprint on file:
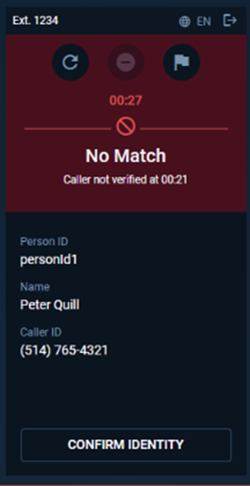
If you receive a Suspected Fraudster, the risk score is higher than the set threshold:
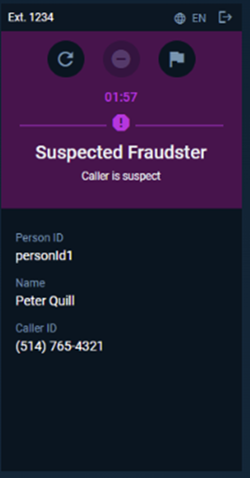
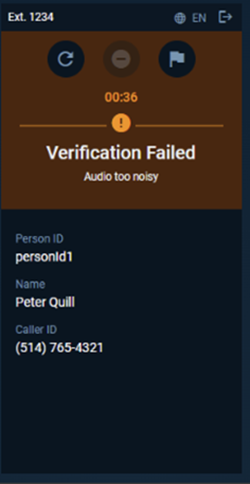
If you receive Verification Failed, the verify didn’t complete with a match, no match, or suspected fraud decision. The sub title will provide related reason such as:
- Inconclusive decision: The risk engine decision was uncertain
- Not enough audio: Not enough net audio processed
- Audio too short | soft | load | noisy: Audio quality was poor
Opt a customer out
You can opt in or opt out on behalf of a customer at any point during the call. Go to the Opt out tab and select a reason.
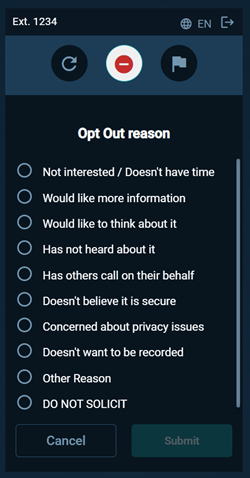
When a customer requests an opt-out, if the system is configured to do so, the application silently conducts a fraud check to ensure they aren’t on the watchlist. The console displays audio acquisition progress in the upper right corner as well as the final outcome after capturing 15 seconds of NET audio and completing the fraud check.
Mark a call as suspicious
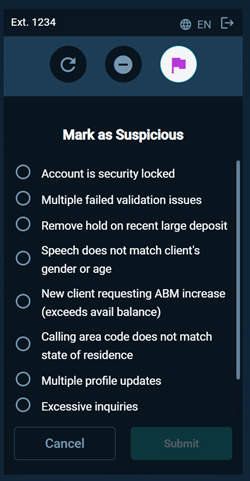
You can mark a call as suspicious at any point during the call, regardless of the operation performed during the call (enrollment, verification, opt-out, or no voice biometrics operation at all). Click Suspicious and select a reason from the list provided. A fraud specialist reviews the call later.
Conference calls
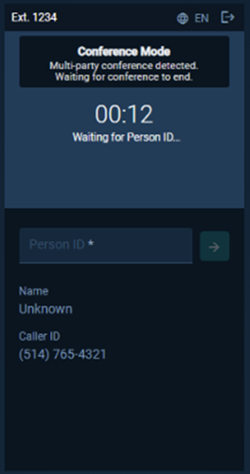
When you add another party to an ongoing call, the system stops or pauses all biometric operations and waits for the conference to end.
After-call work mode
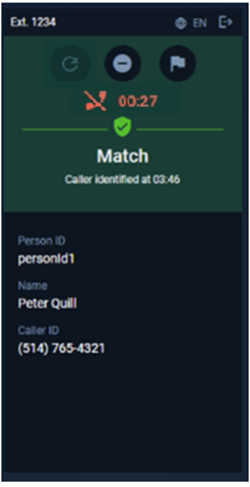
After-call Work Mode enables the agent to continue interacting with the call session after the call ended. This mode ends based on duration or when answering a new call.
Display message
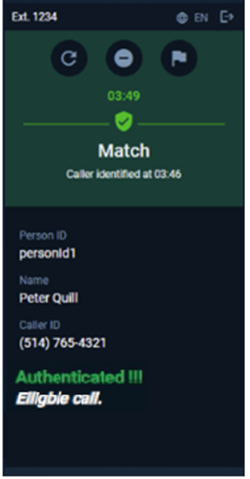
The WAC supports a reserved text area, which is displayed through the different screens during a call. The content is controlled by webhook. See BusinessLogicWebhookConfig or LightRulesConfig for more information.
Error handling
The following screen appears when application errors occur.
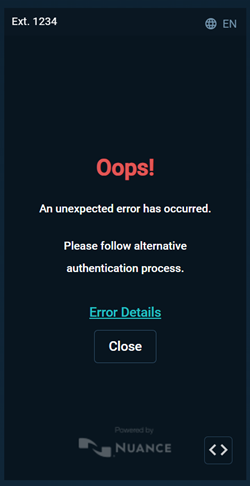
For additional details click Error Details, and the following screen appears. From this screen the agent could trigger a request to send an email that’s pre-populated with error details and contact details.
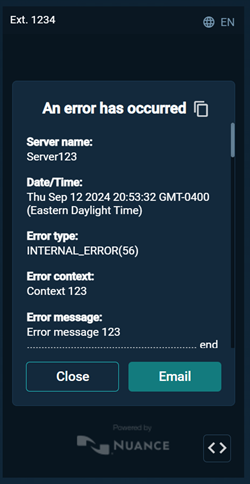
Similar to the login page, there is the icon at the bottom-right corner to copy diagnostic information to clipboard that could be attached to reported issues (even after the issue has occurred).
Additionally, there is the  icon beside the “An error has occurred” text to specifically copy the content of the error details page to clipboard without having to manually scroll and select its content.
Grouping flow
Wait for the next call
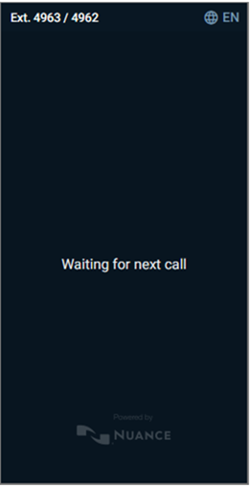
The grouping flow assigns multiple extensions to a single agent. (However, agents don’t handle more that one call at a time.) While waiting for the next call, the system displays the following screen with the assigned extensions at the top left:
Wait for group information
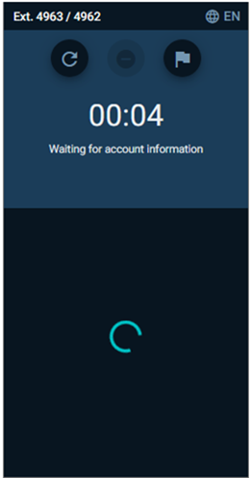
When you answer a call, the system displays a message that it’s waiting for the group details. Groups are also referred to as accounts.
Enroll a customer
Next, the system displays a list of persons.
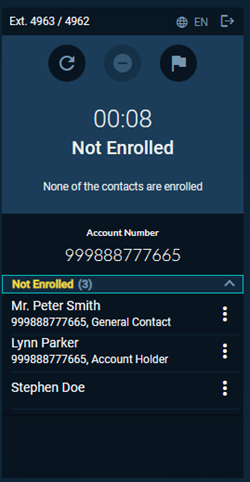
Select the person to enroll and the system starts processing audio for enrollment.
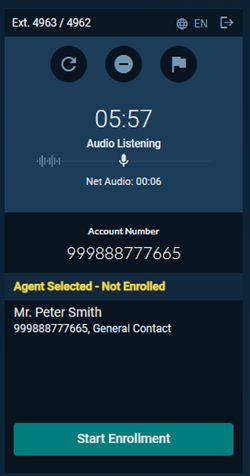
After you collect consent from the caller and approve the enrollment, the system starts the enrollment process and generates a VoicePrint.
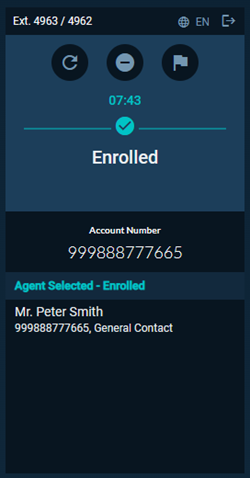
Identify a person in a group
The system performs Identification when several persons from the group are enrolled.
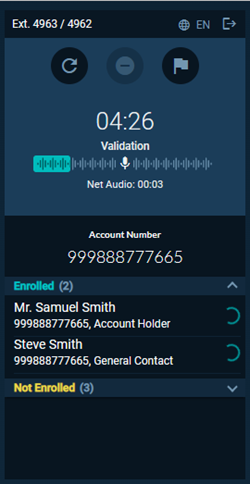
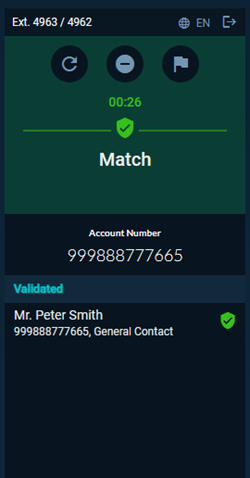
If a person is identified, the system displays the person details as Match.
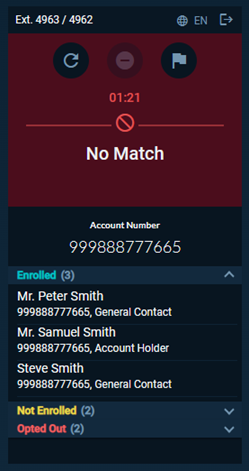
If the caller didn’t match any group member, the system displays No Match.
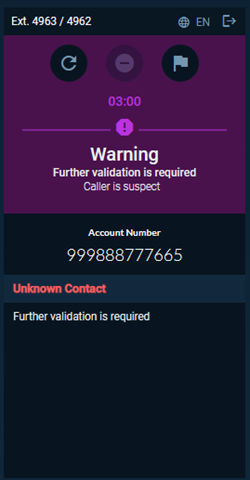
If the person was identified as a fraudster, the system displays a warning page.
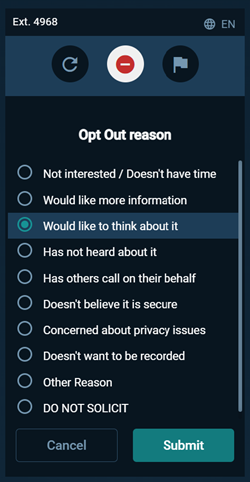
Opt a customer out
You can opt in or opt out on behalf of a customer at any point during the call. Go to the opt-out tab and select a reason.
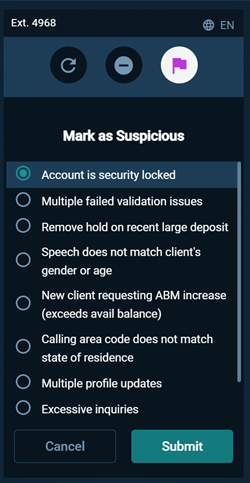
Mark a call as suspicious
You can mark a call as suspicious at any point during the call, regardless of the operation performed during the call (enrollment, verification, opt-out, or no voice biometrics operation at all). Click Suspicious and select the reason from the list provided. A fraud specialist reviews the call.
Additional screens
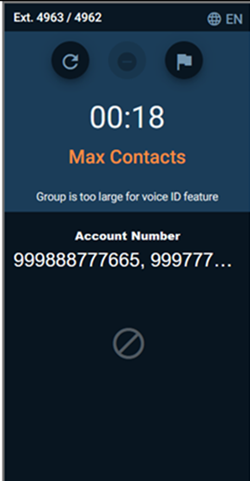
If the system identifies that a group is too large, it displays a warnings screen and doesn’t perform any biometric operation.
Error handling
The following screen appear when application errors occur.
For additional details click Error Details, and the following screen appear. From this screen the agent could trigger a request to send an email that’s pre-populated with error details and contact details.
Similar to the login page, there is the icon at the bottom-right corner to copy diagnostic information to clipboard that could be attached to reported issues (even after the issue has occurred).
Additionally, there is the icon beside the “An error has occurred” text to specifically copy the content of the error details page to clipboard without having to manually scroll and select its content.
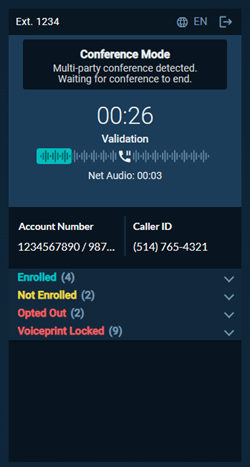
Conference calls
When you add another party to an ongoing call, the system stops or pauses all biometric operations and waits for the conference to end.
Detect known fraudster flow
Start a call
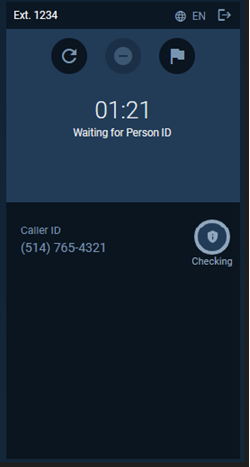
When a call comes in, the detect known fraudster flow starts and a shield displays.
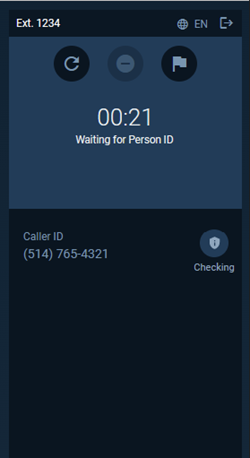
A progress displays around the shield to show progress.
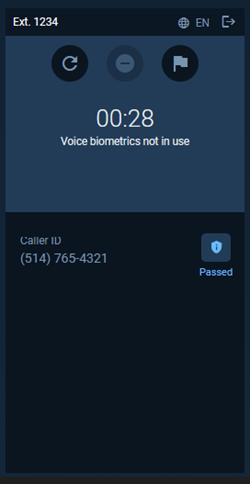
Fraud not detected decision
If fraud isn’t detected, the text under the shield indicates Passed and the title indicates that additional voice biometric operations won’t be executed. In this example, the caller isn’t identified as a fraudster but it’s also not indicated whether the caller is authentic.
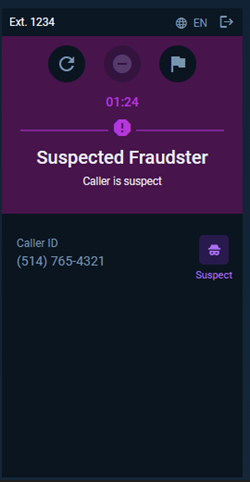
Fraud detected decision
If fraud is detected, the text under the shield indicates Suspect. In this example, the caller is identified as a fraudster.
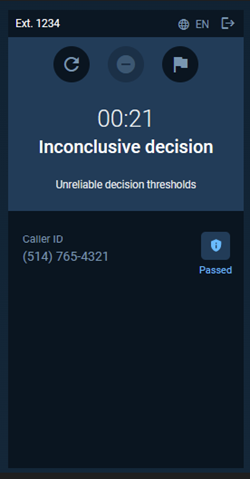
Inconclusive decision
If it isn’t conclusive whether the caller is a fraudster, the text under the shield indicates Passed and the title indicates that it’s an inconclusive decision.
Web Agent Console diagnostic tool
The WAC diagnostic tool assists users to troubleshoot and validate client-side requirements for the proper functioning of WAC. It allows users to perform simplified and on-demand tests of various operations that the WAC executes. It helps to identify and resolve potential client-side issues related to browsers, access tokens, and gRPC-based web operations.
To access the diagnostic tool, go to one of the following links:
| Region | Diagnostic tool sites |
|---|---|
| USA | https://agent.gatekeeper.nuance.com/diagnostic-tool/ |
| Canada | https://agent.gatekeeper.nuance.ca/diagnostic-tool/ |
| UK | https://agent.gatekeeper.nuance.co.uk/diagnostic-tool/ |